Tips to Improve Your Smartphone Photography
by Max Therry from Photo Geeky (site no longer active)
Smartphone photography has never been as popular as it is today. Can you remember when smartphones had absolutely terrible cameras that took pixelated shots? This is now a thing of the past. Modern smartphones are now equipped with high-quality cameras and smartphone photography is on the rise. If you want to brush up on your smartphone camera wizardry, we have created a list of tips that will take your photography to the next level.
Control camera settings
Many people make the mistake of settling for a smartphone camera’s default settings. These settings may indeed produce a great photo, but that doesn’t mean they are the best settings available. When you turn on your camera, the setting will be automatically adjusted depending on light and subject. Default settings usually work fine, but sometimes your camera can focus not on the subject you want it to or make the photo appear too bright. Try to adjust your focus and exposure manually by simply tapping the screen over your intended focus area – those should work the same way for different phones.

Tapping on the bright part under the arch adjusts focus and exposure to avoid white spots
Adjust the smartphone camera settings beforehand
Smartphone cameras now have some advanced features that really give you greater control over your photos. It should be noted that what settings you can change will depend on the model and make of your phone – with iPhone cameras for example you can only change the exposure and focus – to change settings such as aperture, you must download complimentary apps that contain extra functionality (like VSCO, Camera Pro, Manual etc). Android phones have a ‘Pro Mode’, where you’d be able to adjust advanced settings like white balance, aperture, ISO etc. By changing these settings, you will be able to create a greater variety of photos.

Manual controls of free app VSCO
Also, check the image quality and ensure it is set to the highest resolution. If possible, shoot in Raw mode as opposed to JPEG; you can then edit your photos after in greater detail. Use the camera shutter button as opposed to touching the screen. Using the preset shutter button will reduce motion blur when you touch the screen.
Refrain from Using Zoom or Flash
Smartphone camera flash and zoom functions are not great. The flash on a smartphone usually creates a harsh light in a concentrated area. This does illuminate the photo subject, but it looks rubbish and contrived. If you’re needing more light on your subject, try increasing the exposure instead.
Furthermore, the zoom function on most smartphone cameras isn’t a true zoom. By that, we mean that instead of actually magnifying the subject using lenses, the zoom merely explodes the size of the pixels you are seeing and thus the end quality is poor. Instead of using zoom, get closer to the subject and crop a photo after you’ve taken a shot – this way you’ll have the highest image resolution in the frame.
Use different camera functions modes
Most smartphone cameras today will offer an array of advanced shooting modes – if you want to get creative then consider trying them out.
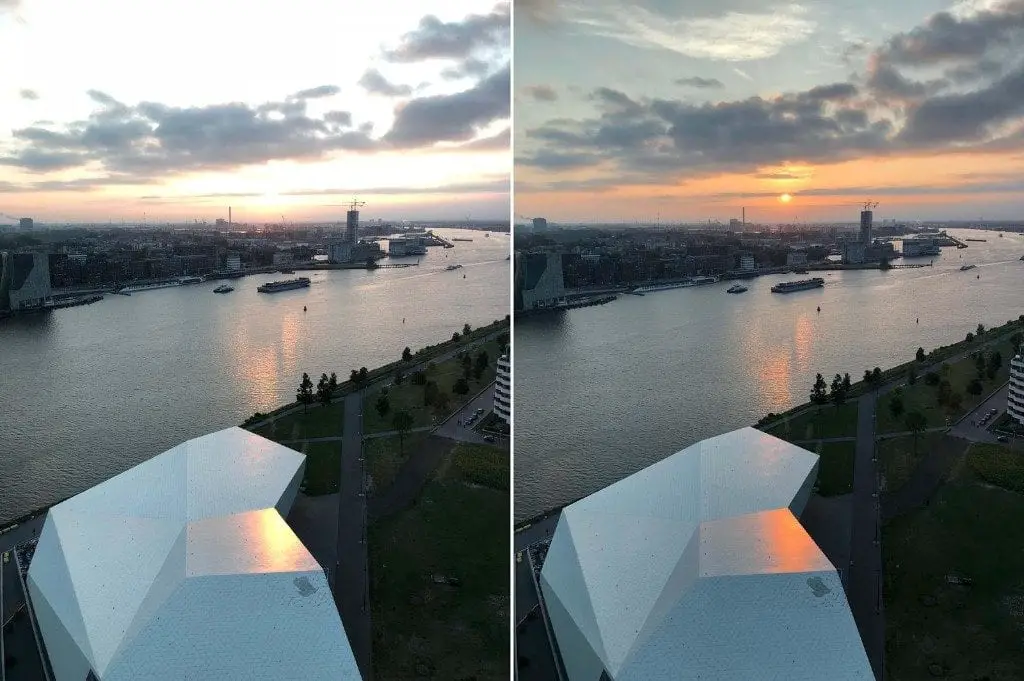
- HDR (stands for high dynamic range) is the mode used to combine several exposures to create a balanced photo. It’s a good choice for landscape photography, because landscapes usually have a wide range of light to capture.

Non-HDR (on the left) and HDR (on the right) photo
- Burst mode is for taking multiple shots in succession to capture motion. If you’re using an iPhone, just hold your finger on the shutter button to get many photos instead of one.
- Panoramic mode takes several shots and stitches them together to form one wide-angle shot. You can adjust the focus and exposure in this mode as well, so don’t forget to do this.
- Portrait mode – available on the phones that have dual lens camera (Apple iPhone X, Huawei Mate 10 Pro, Samsung Note8). Using this mode, you can blur the background while keeping the foreground sharp and focused. As you probably guessed, it’s perfect for taking portraits.
- iPhone Live allows you to create long-exposure images. All you need to do is choose the live photo is your Photos, swipe up and then find “Long Exposure” among the effects. One more tip for iPhone users: you can use + and – on your headphones as a shutter release – really helps to reduce camera shake and very convenient while using a tripod.

Composition techniques
To put it simply, a composition is a way you arrange the elements in the frame. A successful composition should guide the viewer’s eye to the most important element in the frame, have an impact on emotions and help to emphasise the subject. Which composition should be considered as ‘successful’ is a very arguable topic, but there are a few rules based on human perception which can help make your photograph pleasant to the human eye. Here are some of them:
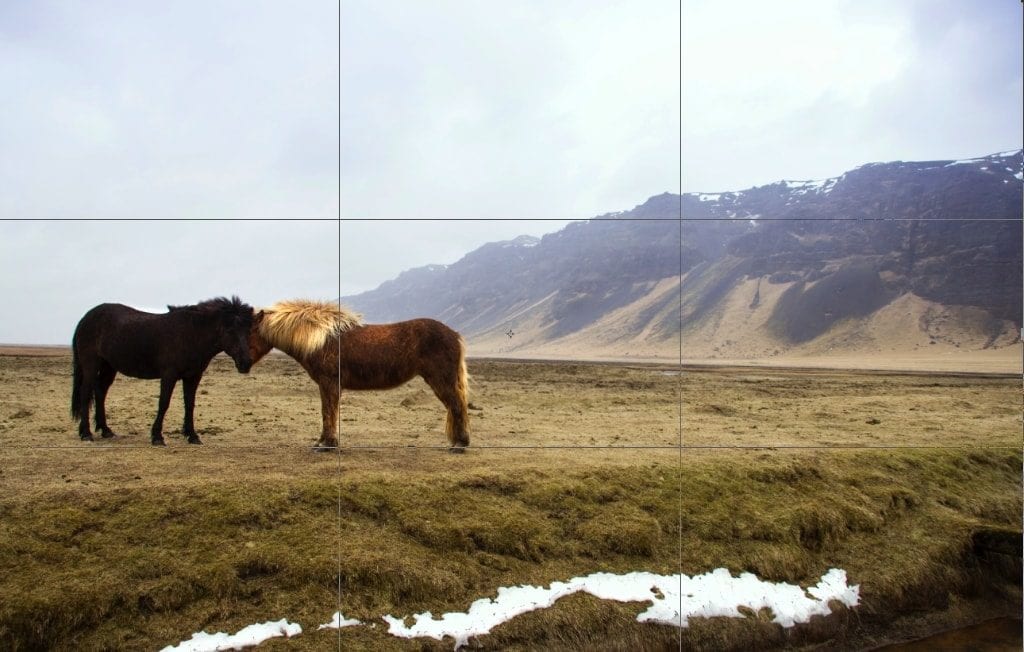
- Rule of thirds: the subject should be placed on intersections or right third, left third, top third or bottom third of the grid you can see below. With most modern smartphones cameras you can turn on the grid lines – lines that overlay over the viewing screen when shooting pictures. They are really helpful for composing your photos, especially for keeping the horizon straight.

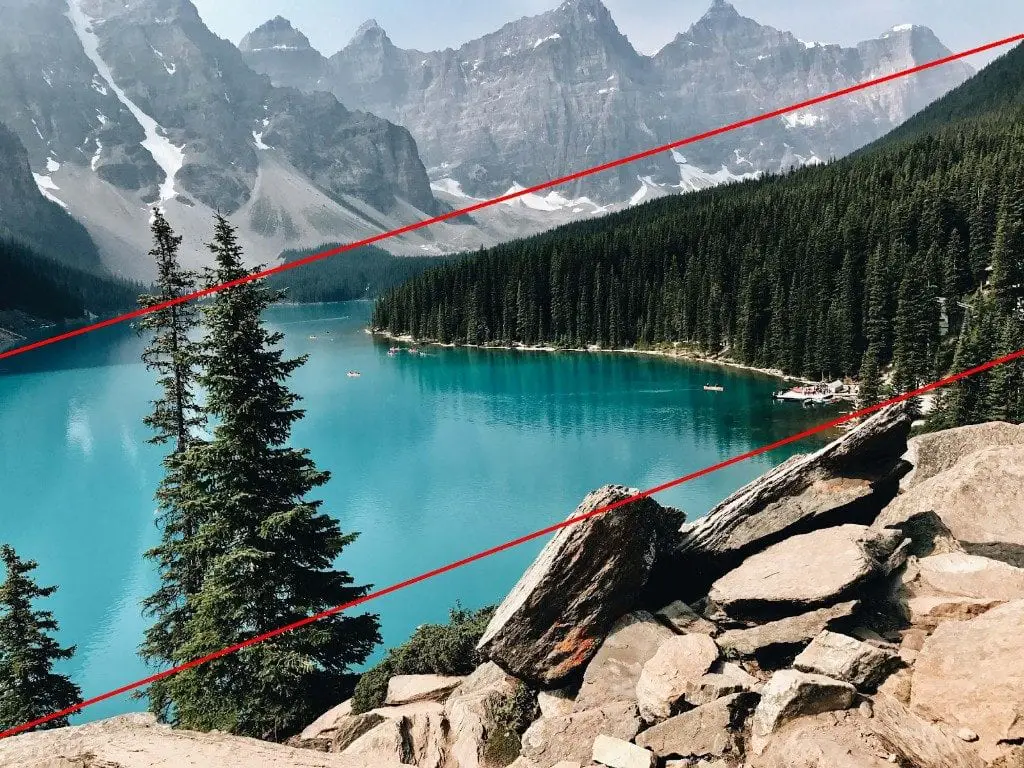
- Leading lines: our eyes are naturally drawn along lines, so those should be used to direct the viewer.

- Simplicity: When we see an interesting shot, we often try to include just everything in our photo. A lot of clutter can distract from the main idea; a clear message can be as effective as possible.

One of the techniques is to use negative space (the empty area which surrounds the main subject) to focus on the subject
- Balance: we are seeking for some kind of equal visual weight, not only in measures and sizes, but also colour, light, textures etc.

Symmetry is the perfect example of balance
- Colour balance (and leading lines)

Arranging of the elements (man, column, palm tree) brings some sense of balance to the image
- Depth and layers: including a foreground, middle ground and background elements to your photograph can give a sense of depth and compensate for the fact that a photograph is two-dimensional.

Foreground, middleground, and background
Using rules and techniques such as these will really help make your smartphone pics look professional.
Look for interesting angles, lines, patterns and bursts of colour
Creativity is the key to smartphone photography. Move around, try out different heights – do anything that doesn’t involve standing with your smartphone at eye level! Your smartphone gives you a great flexibility – use this to our advantage to experiment with height, perspective, and depth when taking smartphone photos.
Look for interesting patterns such as metallic paint, wood grain, and fabric. Look for bright colours and vibrancy, or subtle pallets of colour to create mood and atmosphere. Get up close to objects; basically take your smartphone with you everywhere and snap the unexpected and unusual.
Edit Your Photos
Post processing is a very important part of creative photography that help to recreate the scene you saw with your eyes and give your images professional quality. Even simple edits can improve them drastically in mere seconds. Practically every modern smartphone has some build-in editing capabilities and filters. There is also a multitude of photo editing apps available for download through the Play Store and the Apple Store, that have the basic editing tools like brightness, contrast, saturation etc., as well as add some creative effects.
Smartphone photography really is rewarding and easy to undertake once you know the basics. Next time you are out and about in the great wide world, take your smartphone out of the pocket you and see what awesome shots you can take.
About the Author
Max Therry‘s passion for photography developed during his time in art school, where he would borrow his friends’ cameras and take photos of everything unusual around him. When this passion gained almost obsession-like traits, he bought his own Sony system and vowed to take as many photos as he could. After about a decade of filling up multiple hard drives, he says it’s time to share his experiences with whoever’s interested.
This article was published in July 2018.

